Getting Started with mIRC
It usually only takes a few minutes to get started with mIRC. The following guide
will take you through the first few steps of downloading and using mIRC.
|
1
|
Before you can start using mIRC, you will need to download and
install it. If you have already done that, you can skip this step.
You can download mIRC by clicking here. A download
window should appear, similar to the one below. Once the download has completed, you should click
the Run or Open button and follow the steps in the installer to
install mIRC.
|
|
2
|
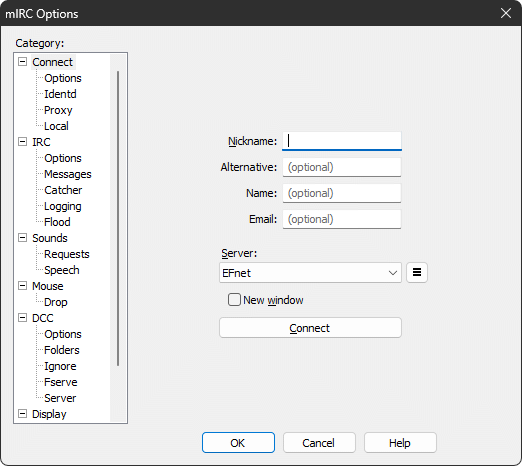
You can now run mIRC by double-clicking on the mIRC icon on your desktop or in your Windows
Start menu. You should then see the Connect window below that you can
use to connect to IRC.
You should choose your Nickname and Alternative nickname.
These are the names by which other people will know you on IRC.
You will also need to enter something for your Full Name and Email Address.
These do not have to be your real full name and email address.
You can then click the Connect button and mIRC will connect to your chosen server.
In the example below, we are connecting to the Efnet IRC network.
|
|
3
|
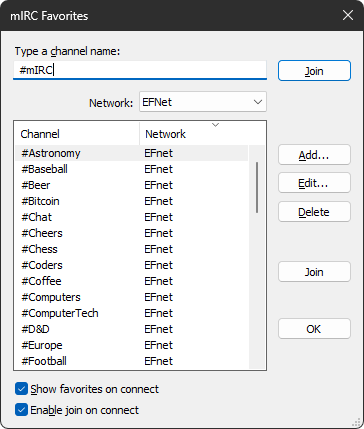
Once you have connected to a server, your mIRC Favorites window
will pop up. This window stores a list of your favorite channels and allows you
to join them quickly and easily.
You can type in the name of a channel, such as #mIRC, or you can select
a channel from the list. You can then click the Join button and
mIRC will join your chosen channel.
|
|
4
|
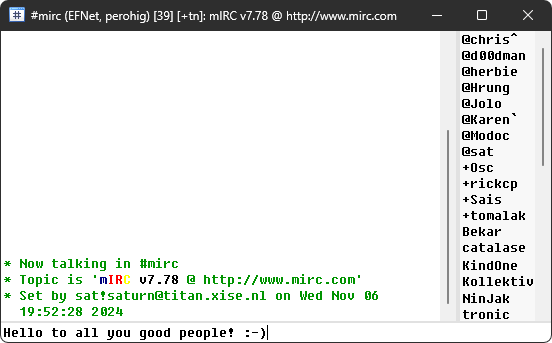
In the window below, we have joined channel #mIRC on the EFNet IRC network,
my nickname is zigzag, and there are 40 people on the channel.
You can now type in a message, such as "Hello to all you good people! :-)",
press the enter key, and hopefully you'll receive a few greetings in return!
|
|
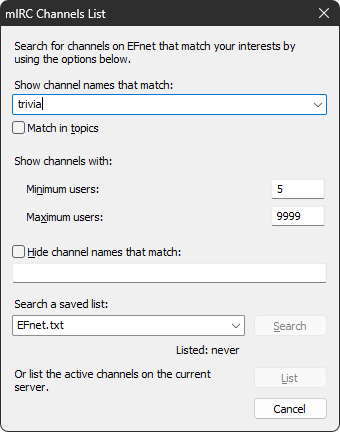
5
|
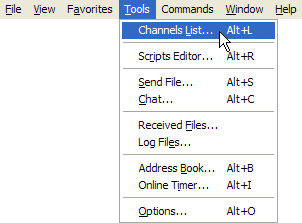
The next step is to get a list of the active channels on this network by opening
the Tools menu and selecting the Channels List
menu item.
This will open the Channels List window below which you can use to get the list
of channels. In this example, we want to look for trivia channels, so we have typed
in the word trivia.
You can now click the List button and mIRC will get the list
of active channels from the network.
Some of the larger networks, like EFnet, may have thousands of
channels, so be patient - it can sometimes take a few minutes to get the full list.
Once the listing has finished, you can double-click on channels to join them, or
right-click for other options.
|
|
6
|
Congratulations! You have just connected to an IRC network, joined a channel,
and sent your first message! You also retrieved a list of the active channels
on a network.
The world of mIRC and IRC are now yours to explore. Good luck and have fun :-)
|
|